
Cryo-preserving banana substrates is a foundational technical protocol designed to halt enzymatic browning, arrest starch-to-sugar degradation, and optimize the rheological texture of functional blends. Freezing at peak cellular density locks in the fruit’s natural carbohydrate architecture, allowing these frozen matrices to act as thermal and structural texturizers that deliver a creamy consistency without the need for thermal thinners or crystalline ice.
This technical guide outlines an efficient flash-freezing sequence to isolate individual fruit fractions, preventing cellular crystallization and structural clumping. You will discover the exact mechanics of ripeness selection, substrate layering, and anaerobic storage parameters required to eliminate freezer burn, maintain volatile compound integrity, and ensure smooth blender blade engagement during high-velocity homogenization.
Before You Freeze: Pick the Right Bananas and Set Up Your Space
Freezing bananas is easy, but a tiny bit of planning makes a huge difference. The goal is banana pieces that separate like frozen berries, not a single mega-clump that fights your blender.
Bananas also change flavor as they ripen. When you freeze at the right point, you lock in the taste you want. Think of it like taking a screenshot of ripeness.
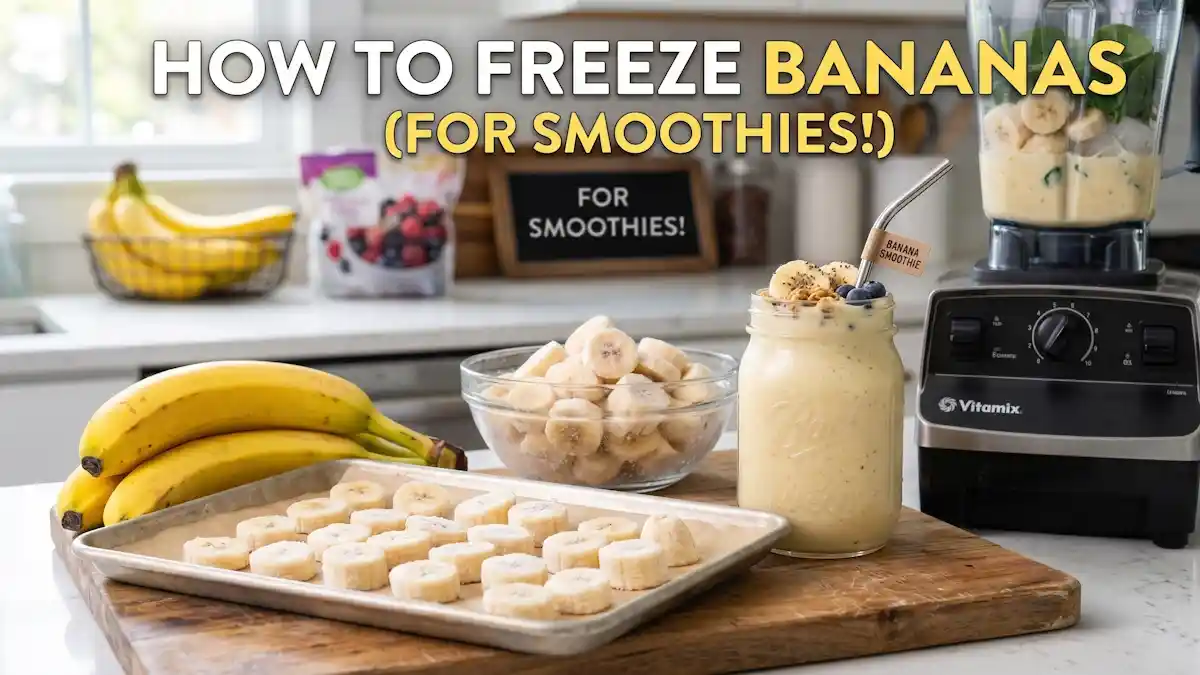
Best ripeness for smoothies (yellow, spotted, and overripe)
Here’s a practical way to choose:
| Banana stage | Best for | What it tastes like in smoothies |
|---|---|---|
| Mostly yellow | Mild flavor, less sweet | Clean, lightly sweet |
| Yellow with brown spots | Everyday smoothies | Sweeter, creamier, more “banana” |
| Very ripe (lots of brown) | Strong banana flavor, less waste | Very sweet, more banana-forward |
Very green bananas can taste starchy in smoothies and won’t give that dessert-like sweetness.
Quick tip: If your bananas are ripening too fast, freeze them the same day. Waiting “one more day” is how you end up with fruit flies and regret.
If you want a second opinion on timing and ripeness, this guide from Downshiftology on freezing bananas is a helpful reference.
Quick prep checklist (knife, parchment, baking sheet, bags)
You don’t need special gear, just a few basics that keep things neat:
- Cutting board and a sharp knife
- Parchment paper or a reusable silicone mat
- Rimmed sheet pan (helps catch pieces that roll)
- Freezer bags or airtight containers
- Marker for the date (future you will thank you)
That sheet pan step matters. Pre-freezing in a single layer is what prevents the dreaded banana brick, so you can grab a handful anytime instead of hacking at a frozen lump.

How to Freeze Bananas (For Smoothies!) Step by Step
This is the method that works even if you’re doing it at night, half-asleep, trying to save bananas that are one day from turning into banana bread.
- Clear a flat freezer spot.
Make room for a sheet pan to sit flat. If it tilts, pieces slide and refreeze together. - Peel the bananas.
Always peel first. Frozen peels stick like glue and are miserable to remove. - Cut into your preferred shape.
Coins, chunks, halves, or mashed all work, but each has a best use (more on that below). - Line your sheet pan.
Use parchment or a silicone mat so banana pieces pop off cleanly. - Spread in a single layer.
Keep pieces from touching if you can. A little space now saves a lot of frustration later. - Flash-freeze until firm.
Freeze for 1 to 2 hours, just until the outside is solid and pieces don’t stick together. - Transfer to a bag or container and label.
Write the date and, if you want, the portion size (like “1 banana per bag”). Press out as much air as possible before sealing.
To reduce freezer burn, store bags flat and keep them in the coldest part of your freezer (usually the back). For best flavor and texture, use within 2 to 3 months. They’ll stay safe longer if kept frozen, but quality slowly drops.
For more storage pointers and variations, Simple Green Smoothies’ guide to freezing bananas is a solid companion read.
Slice, chunk, or mash: which shape blends best?
Shape affects both blending and how easy it is to measure.
Coins (slices): Easy to portion, great for smaller blenders, fast to blend.
1-inch chunks: Best all-around choice, quick prep, easy to grab by the handful.
Halves: Fine for high-power blenders, less cutting, but harder to measure.
Mashed banana: Great for baking later or for smoothie packs when you want exact amounts.
Freezing whole bananas is only okay if they’re peeled, but they’re harder to blend and harder to portion. If you’ve ever listened to a blender struggle, you know the sound.
Flash-freeze first, then store for no clumps
Flash-freezing is the “separate now, scoop later” trick.
Once pieces are firm, move them quickly into a labeled freezer bag. Then:
- Remove air: Press the bag flat, or zip it almost closed and gently use a straw to pull out extra air (stop before it collapses into the fruit).
- Store flat: A flat bag freezes faster and stacks better.
- Don’t overload one bag: Smaller bags freeze more evenly and are easier to open.
If you prefer containers, choose ones that seal tightly and aren’t half-empty (empty space means more air, and more air means more freezer burn). If you want a detailed look at halved versus sliced storage, Clean Eating Kitchen’s freezing bananas method compares options clearly.
Using Frozen Bananas in Smoothies: Easy Ratios, No-Fail Blending, and Fixes
Frozen bananas can go straight from the freezer to the blender. No thawing needed, and no soggy texture.
The big win is that frozen banana can replace some, or all, of your ice. Ice is cold, but it also waters flavors down. Frozen banana gives cold plus body, like turning your smoothie into a milkshake without the ice cream.
How much frozen banana to use (and when to skip the ice)
A simple rule for a standard smoothie:
1 medium frozen banana (about 1 to 1 1/2 cups frozen chunks) for a 16-ounce smoothie.
Skip the ice if you’re using frozen banana plus other frozen fruit. Add a few ice cubes only if you want it extra thick, or if most of your other ingredients are fresh.
If your smoothie gets too sweet, balance it with tart or tangy add-ins like Greek yogurt, kefir, citrus, or berries. Even a small squeeze of lemon can brighten a banana-heavy blend.
Troubleshooting: blender stuck, too thick, too thin, or banana flavor is too strong
Blender stuck: Add liquid 1 to 2 tablespoons at a time, then pulse. Start on low, then ramp up. Use a tamper if your blender has one.
Too thick: Add more milk, water, or yogurt slowly. Don’t run the blender dry, it can overheat the motor.
Too thin: Add a handful of frozen banana chunks, oats, or chia. Give chia a minute to thicken.
Banana flavor too strong: Add frozen berries, cocoa, peanut butter, or coffee. These soften the banana taste without needing extra sugar.
Rock-hard pieces: Let the banana sit on the counter for 2 to 3 minutes, then blend.
Make-ahead idea for busy mornings: portion frozen banana chunks into small bags with your add-ins (like spinach and berries). In the morning, dump a bag into the blender, add liquid, and you’re done.
Conclusion
Freezing bananas for smoothies doesn’t need to be complicated. Peel them, cut them, flash-freeze on a lined sheet pan, then bag them with the air pressed out. That simple routine means creamier smoothies, less food waste, and faster mornings when you’re hungry and short on time.
Don’t wait for bananas to “almost” go bad. Freeze them when they’re at the sweetness you like, and label the bag with the date so you rotate through the oldest first. Try it this week, and set yourself up for a smoother breakfast routine.
🛡️ Safety Notes & Contraindications
Anaerobic Spore Proliferation in Headspace: CRITICAL: While freezing halts active bacterial replication, it does not sterilize the substrate. Utilizing the “straw method” to extract air from plastic freezer bags creates a localized vacuum that limits aerobic oxidation, but if the fruit is left thawing at room temperature post-storage, it can favor the germination of dormant anaerobic spores. Always transfer frozen chunks directly from the freezer to the high-velocity blender blade core.
Insulin Volatility and Ripeness Glycemic Index: The glycemic index of frozen banana matrixes shifts dramatically based on the targeted screenshot of ripeness. Overripe (brown) bananas present an accelerated concentration of rapidly absorbable simple sugars (fructose/glucose). In individuals managing Type 2 Diabetes, severe insulin resistance, or Metabolic Syndrome, this high-flux glucose delivery can cause unexpected hyperinsulinemic spikes. Prioritize early spotted or mostly yellow profiles.
Renal Potassium Filtering Saturation: Banana substrates are a heavy dietary source of organic Potassium ($K^+$). Delivering a concentrated whole frozen banana within a dense daily liquid protocol creates an acute internal surge of electrolytes. For individuals presenting with advanced Chronic Kidney Disease (CKD, Stages 3-5) or managing prescriptions of potassium-sparing diuretics, this potassium density requires precise clinical validation to prevent hyperkalemia risks.
Fructose-Induced Small Intestinal Osmotic Shifts: In phenotypes diagnosed with Fructose Malabsorption or active Irritable Bowel Syndrome (IBS), a rapid, high-density load of cold, liquefied fructose can saturate the GLUT5 transport carriers in the enterocyte brush border. The unabsorbed sugar draws fluid into the bowel lumen, potentially triggering sudden osmotic cramping, abdominal distension, or rapid gastrointestinal transit.
Plasticizer Leaching during Storage Shifts: Storing individual fruit fractions inside low-grade or non-BPA-free plastic bags for prolonged cryo-preservation windows can subject the plastic to mechanical stress and structural micro-cracking due to low temperatures, increasing the risk of plasticizer leaching onto the fruit tissue. Utilize strictly certified pharmaceutical-grade bags or airtight inert glass containers.
FAQ
How do cryopreservation thermodynamics halt the post-harvest starch-to-sugar degradation in bananas?
Bananas undergo continuous ripening driven by the internal gas ethylene, which upregulates enzymes like amylase to cleave long-chain structural starches into simple sugars (fructose and glucose). Biochemically, rapid cryopreservation forces immediate metabolic arrest by lowering the system’s kinetic energy. Supporting this physiological system through timely freezing locks the carbohydrate architecture at your precise target ripeness, preventing further carbohydrate degradation and preserving the optimal structural starch profile.
Why does a “Flash-Freezing Sequence” on a lined sheet pan prevent macro-molecular clumping?
When fruit fractions are frozen in a bulk mass, moisture leaves the cells and accumulates in the interstitial spaces, forming large, solid ice bridges that fuse the produce into a single block. Biochemically, flash-freezing individual coins or chunks in a single layer ensures rapid, independent phase transitions. Supporting this physiological system creates isolated botanical fractions that remain physically distinct, enabling easy portioning and reducing mechanical friction when the blades engage.
What molecular mechanisms cause “Enzymatic Browning” during banana storage, and how does anaerobic sealing block it?
When banana tissue is cut or damaged, cell compartmentalization breaks down, exposing native phenolic compounds to the enzyme Polyphenol Oxidase (PPO). In the presence of atmospheric oxygen, PPO oxidizes these phenolics into quinones, which polymerize into brown melanin pigments and alter flavor volatile profiles. Biochemically, pressing all ambient headspace out of the storage container removes the primary gaseous substrate ($\text{O}_2$) required for this reaction, optimizing the natural pathways of pigment preservation.
Why does a cryopreserved banana matrix function as a superior rheological texturizer compared to crystalline ice?
Crystalline water ice drops fluid temperatures but dilutes the mixture as it melts, breaking down the emulsion and causing phase separation. Biochemically, a frozen banana matrix delivers solid-phase water wrapped inside a dense network of uncoiled plant pectin and soluble fibers. Supporting this physiological system through blending creates a stable, high-viscosity colloidal suspension (yielding a “milkshake” rheology) that clings to cellular nutrients and slows down downstream intestinal transit.
How does utilizing a frozen starch matrix support “Mitochondrial Priming” and glycemic control?
Flooding the upper GI tract with rapid-acting glucose from warm, completely overripe fruit creates an acute postprandial glycemic surge that forces cellular mitochondria into an overworked redox state. Biochemically, utilizing bananas frozen at the “spotted yellow” stage preserves a portion of Type 2 Resistant Starch (RS2) and complex fibers. Supporting this physiological system with a chilled, viscous matrix modulates gastric emptying, providing a metered, steady fuel flux that supports mitochondrial respiration with minimal metabolic friction.

Medical Disclaimer: The information on AnySmoothie is for educational and informational purposes only. It is not intended as medical advice or a substitute for professional consultation with a healthcare provider. Always consult your physician before starting any new nutritional protocol, especially if you have underlying health conditions or are taking medication. By using this site, you agree to our full Disclaimer & Terms of Use.